


How to Sew a Waterproof Clear Vinyl Makeup Bag (Easy Travel Pouch Tutorial)
By a Bug & a Bean | Posted on 2026-01-07Learn how to sew a waterproof clear vinyl makeup or travel bag with a zipper and bias binding. Beginner-friendly step-by-step tutorial + tips for sewing vinyl.
Post TagsSEWING PROJECTS SEWING FOR TEENS
This post may contain affiliate links. If you make a purchase through one of our affiliate links, we may receive a small commission at no additional cost to you.
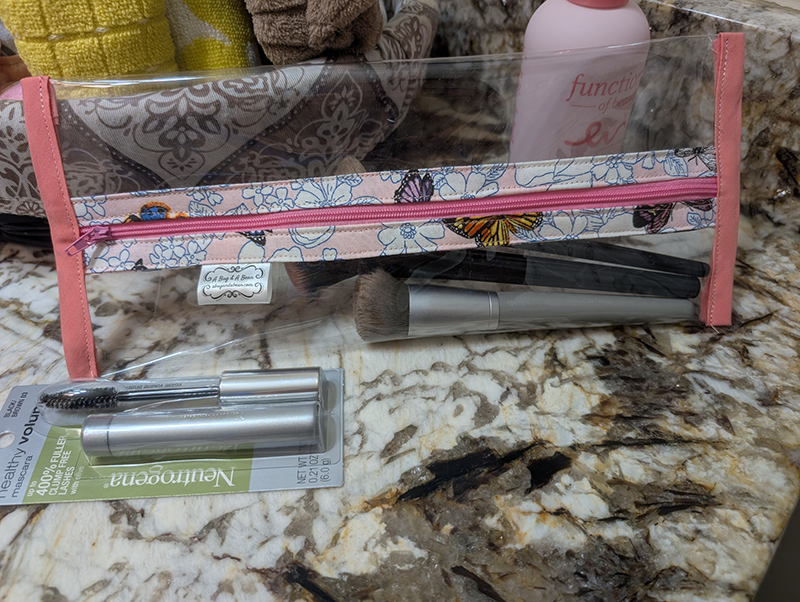
Table of Contents
- Why You’ll Love This Waterproof Vinyl Pouch
- Supplies & Materials
- Recommended Tools
- Before You Start: Tips for Sewing Clear Vinyl
- Step-by-Step: How to Make the Waterproof Makeup or Travel Bag
- How to Use This Waterproof Vinyl Bag
- Easy Customization Ideas
- Quick Care Instructions
- Video Tutorial
- More Beginner-Friendly Sewing Projects
Don't Forget to Pin This!
Don't lose this idea. Save it for later or share the magic with a friend. Pin it to your favorite Pinterest board!
If you’ve been wanting a simple sewing project that’s both cute and practical, this waterproof clear vinyl makeup bag is it. This little pouch is perfect for makeup brushes, toothbrushes, toothpaste, hair ties, travel minis, and anything you want to keep contained (and spill-proof!). The clear vinyl makes it easy to find what you need fast, and the bias binding gives the edges a clean, professional finish.
Why You’ll Love This Waterproof Vinyl Pouch
- Waterproof and wipeable (great for bathrooms, travel, and messy kids)
- Clear vinyl makes it easy to see what’s inside
- Beginner-friendly construction with straight seams
- Perfect size for makeup, toiletries, or a small travel essentials bag
- Looks adorable with optional handmade tags
Supplies & Materials
For this project, you will need:
- 1 piece clear vinyl cut to 10 x 12 inches
- 2 pieces double fold bias binding, at least 10 inches long (for the zipper sides)
- 2 pieces double fold bias binding, at least 7 inches long (for the top/bottom edges)
- 1 long zipper, at least 10 inches long
- Optional: handmade tags
Tip: You don't need to buy bias binding. Make your own custom double fold bias binding with cotton fabric scraps. You can watch our quick video tutorial to get started. If you are new to sewing, make sure to check out our essential sewing shopping list. We list out our favorite products and the things you will need to complete most of the beginner tutorials on this website.
Recommended Tools
- Sewing machine
- Zipper foot
- Clips (recommended for vinyl instead of pins)
- Scissors or rotary cutter + mat
- Thread (polyester thread is great for durability)
Sewing Gifts Under $10

100 Pack Sewing Clips in Tin
Not only are these clips extremely useful for keeping your fabric together, they come in an adorable tin that will look great in your sewing room!

Madam Sew Needle Sort Pin Cushion
This genius idea is a unique gift to keep track of your different machine needles and have them at the ready when needed!

Magnetic Bobbin Organizer
This unique gift is magnetic and can pop right onto your sewing machine for quick access to bobbins and scissors.

Magnetic Pin Cushion
This magnetic 'pin cushion' is amazing for keeping your pins organized. Wave it above your workspace and it will attract the loose pins.

Magnetic Seam Guide
Sew straight hems with this magnetic seam guide. The universal design of this seam guide is compatible with most sewing machines.

Thread Snips
My grandma used to carry these in her purse and now I've followed in her footsteps! You will use these everyday for cutting loose threads.
Before You Start: Tips for Sewing Clear Vinyl
- Use clips instead of pins to avoid permanent holes in the vinyl.
- Lengthen your stitch slightly (around 3.0–3.5) for smoother seams.
- If vinyl sticks to your machine bed, place tissue paper under it and tear away after sewing.
- Go slow and keep seams straight—vinyl doesn’t “press” like fabric, so accuracy matters.
Step-by-Step: How to Make the Waterproof Makeup or Travel Bag
-
Bind the first 10-inch edge.
Place one 10-inch edge of the vinyl inside the center fold of one 10-inch piece of double fold bias binding. Clip in place and sew across the full edge. -
Attach the zipper (first side).
Open your zipper. Place the folded edge of the bias-bound vinyl on top of one side of the zipper tape. If you’re using a handmade tag, slide the raw edges of the tag between the vinyl/binding area so it’s caught in the seam. Clip everything together and sew using a zipper foot. -
Bind the opposite 10-inch edge and attach the zipper (second side).
Repeat the same process for the other 10-inch edge of vinyl: place the edge into the center fold of the second 10-inch bias binding, clip, and sew across. Then attach that bound edge to the other side of the zipper with a zipper foot. -
Zip the sides together to form the pouch.
You should now be able to zip the zipper closed, which brings the two vinyl edges together and forms the bag shape. -
Bind one short edge with 7-inch bias binding.
Unfold one 7-inch piece of bias tape. With the bag folded, line the top edge of the vinyl with the top edge of the unfolded bias tape. (At this stage, the folded width of the pouch should be about 6 inches, and the bias tape should hang evenly over both sides.) Sew across. -
Wrap and finish that edge.
Fold in the extra bias tape on both ends for a neat finish. Then fold the bias tape over the raw vinyl edge, clip (or pin carefully), and sew across again to secure the binding. -
Repeat on the other short edge.
Repeat the exact same binding steps with the second 7-inch piece of bias tape on the remaining raw vinyl edge. -
Final check.
Zip and unzip to make sure everything moves smoothly. Trim any loose threads, and your waterproof vinyl pouch is ready to use!
How to Use This Waterproof Vinyl Bag
- Makeup brushes + mascara + lip gloss
- Travel toiletries (toothbrush, toothpaste, floss)
- Hair supplies (ties, clips, mini spray bottle)
- Beach bag essentials (sunscreen, aloe, chapstick)
- Kids’ “mess kit” (wipes, bandages, small creams)
Easy Customization Ideas
- Use glitter, holographic, or tinted vinyl for a fun look.
- Choose contrasting bias binding for a bold edge finish.
- Add a handmade tag at the zipper seam for a boutique-style detail.
- Try a cute charm on the zipper pull for extra personality.
Quick Care Instructions
To clean your clear vinyl bag, simply wipe it with a damp cloth (mild soap if needed). Let it air dry completely before storing. Because vinyl can warp under high heat, avoid ironing directly on the vinyl.
Video Tutorial
Watch us make this project on TikTok. Follow us @abugandabean for more sewing and creative tutorial videos.
@abugandabean Check out what I made with the custom bias binding from yesterday! These waterproof travel bags are sew easy to make and I absolutely love them for on the go with kids! You can make one in a few minutes and they are a great way to use up your scrap fabrics. These also do great at craft markets since they are so useful! Visit my website for full tutorial and measurements. This is for a extra wide bag (10 x 12 inches). For a shorter bag, shorten the 10 inch side to 8 inches. You will also need 2 pieces of 10 (8 for smaller bag) inch long bias tape, 2 pieces of 7 inch long bias tape, and a zipper 10+ (8+ for smaller bag) inches long. 🎒 Great for travel 💄 Makeup friendly 💦 Waterproof & wipeable #SewingTutorial#BeginnerSewing#SewWithMe#ZipperPouch #quicksew #handmadesewing #sewingtiktok #abugandabean #sewingmywayto10k #fyp #craftymoms #craftytiktok #sewingtok #diy #diyideas #makethis #tutorials #sewinghowto #sewinginspo #MakeupBagDIY #TravelBagDIY #HandmadeAccessories #SewingProjects #DIYSewing #ClearVinyl #SewingTips #CraftTok #smallsewingproject ♬ Girls Just Want to Have Fun - yourmusic4ever💯
More Beginner-Friendly Sewing Projects
If you loved this tutorial, you might also enjoy our easy sewing projects for fabric scraps.
Join the Crafty Creator Club ✨
Get exclusive access to free printables, special discounts, custom template access codes, and creative inspiration.
Join the Magic